With many DIY kitchen options available on the market, it’s often a cheaper alternative to have a brand-new kitchen on a budget when choosing this option.
However, a new kitchen or a renovated kitchen will most likely mean a new splashback. Knowing how to tile this yourself will make a huge difference in the look and function of your kitchen area. It will also save you money that can be spent elsewhere.
Tiling a splashback may seem like a daunting task, especially if you’ve never tiled before, but it’s a straightforward job, especially if you choose an easy tile design.
What you will need to tile a splashback:
- Tiles of your choice
- Grout (there are many different colours of grout available; choose one that is easy to clean but also will make your tiles pop)
- Tile adhesive
- Floor coverings to protect your floors
- Grout float
- Bucket (we recommend a small and large bucket)
- Brand new sponge
- Dishwashing liquid
- Water
- Tape measure and pencil
- Level
- Gloves
- Tile spacer
Preparing Your Wall
Preparing your wall is a vital step to ensure that you have success when tiling your splashback. Clean your wall area with basic soap and water and allow it to dry thoroughly. Also, cover your benchtops with sheeting or a drop sheet to prevent them from being covered in adhesive and other mess.
Depending on what tiles you are using for your splashback, you may need to prime your wall with a waterproof adhesive. It’s important to check with the tile manufacturer and confirm their recommendations.
The type of wall that you’re tiling over also needs to be considered. If the wall is painted, then you should sand it back. By doing this, it will allow the mortar to adhere better, giving you a better finish.
Measuring Your Tiles
It’s time to measure your area. Using your tape measure and level, mark out a plumb line; you can do this both horizontally and vertically. These are straight lines that you can refer to as a guide as you’re tiling. It is also helpful to use these lines as your starting point and ensure that your tile is level.
If your wall area has a PowerPoint on it, ensure power is turned off to this before you commence. You will also need to measure where this sits on the tiles before you start laying them. You will need a tile cutter to make the necessary cuts to ensure your tiles fit correctly around the PowerPoint. Tile cutters are available for hire and will make clean cut lines on your tiles.
Mixing Your Mortar and Adhesive
Selecting the right adhesive for your tile is important. If you’re not sure what is the best option, speak to your tile supplier or local hardware store. There are ready mixed adhesives available which will make your tiling job a little easier. If you use a cement-based adhesive, you will need to mix this yourself by following the instructions available on the packaging.
Around your wet areas (ie: around your sink and tap areas), it’s important that you’re using a waterproof adhesive. This will prevent water from getting behind the tiles and lifting over time. Some people choose to use a waterproof adhesive for all their kitchen areas as a precaution.
Applying the adhesive
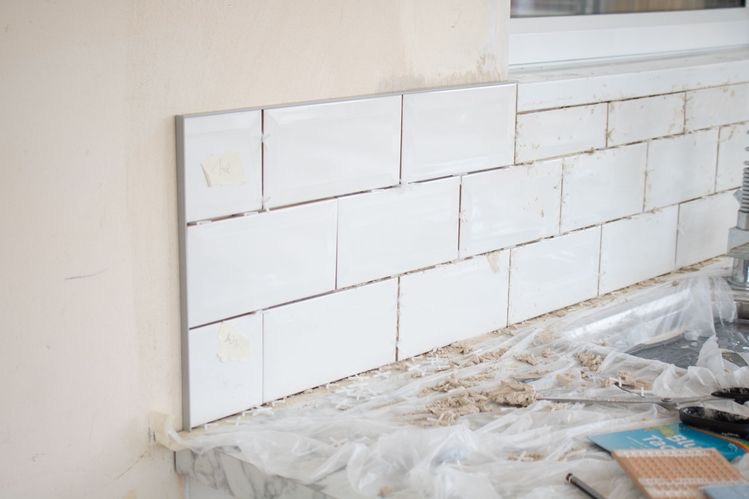
For a splashback, it is easier to start from your benchtop and work your way up. This will allow for a full tile to be used against your benchtop. Using a trowel, apply the adhesive and create grooves with the adhesive. You want to apply a generous layer, all in the same direction, which will allow the tiles to stick.
Do a small area at a time to ensure the adhesive doesn’t dry before you’re ready to place your tiles.
Laying your tiles
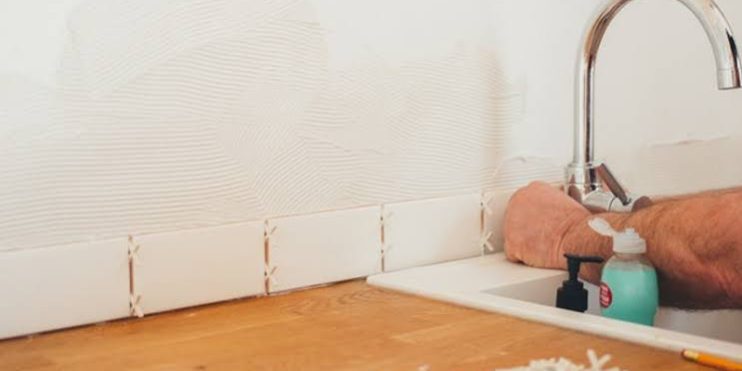
Once you’ve applied your adhesive, carefully push your tile onto the adhesive and place a tile spacer alongside each edge. Repeat the process until you’ve covered that adhesive area, and wipe the surface to remove any glue residue. It’s important to use a clean sponge. Remember, the adhesive will dry quickly, so the sooner you remove it from the tiles, the better.
Repeat the process until you’ve covered the splashback area. Once completed, you now need to leave the tiles for at least a few hours (overnight would be better) before applying the grout.
Applying the Grout Mix your grout in a bucket. It is recommended that you mix a small amount at a time, as the grout will set quickly. Leave the grout for 2 minutes and give it another mix before applying it over the tiles. You want to ensure that you have a thick consistency.
Using a grout float, scoop the grout and press it into the gaps by holding the float at a 45-degree angle. Slowly (and firmly) spread over your tiles. You can use a spatula as an alternative option if you don’t have access to a grout float.
Wipe the tiles clean with a damp cloth or sponge. Ensure that you do this on a regular basis, but you don’t want to overwet the tiles as it can weaken the grout.
Once you’ve finished applying the grout over all your tiles, allow it to set for at least an hour. Once you’ve completed this step, wipe it down one more time to ensure that you have a clean finish. You can then apply a sealant along the edges of your tiles to ensure the area is completely watertight.
With all our ‘How to Blogs’, we recommend that you use this as a guide only and do further research by visiting the HIA website. The HIA Website provides expert knowledge in all areas of building and home renovation.


