It’s well known that tiles are a popular choice for walls in bathrooms and even kitchens. Tiles are a durable choice and easy to maintain, and are long-standing. However, eventually, the tiles may become outdated, and it’s common to do a small basic renovation on tiles to breathe new life into the area you’re renovating.
It’s important when removing wall tiles that it’s done properly to reduce significant damage to the surface underneath.
Is it difficult to remove wall tiles?
Removing wall tiles can be easily done, but your patience is needed! This is extremely important if you are only renovating the tile area, as you don’t want to damage the surface underneath. However, if you’re doing a full renovation and installing new plasterboard, then you can be less cautious. Any damage that occurs will need to be repaired to ensure you have a smooth surface. The more time that you spend removing the tiles carefully, the less time you will need to spend on preparing the wall afterwards.
Tools and materials you’ll need
You don’t need extensive DIY experience to know how to remove wall tiles, but it’s important that you have all the tools and materials you need ready to go so your renovation goes as smoothly as possible.
The tools and materials you may need to remove wall tiles are:
- Safety glasses
- Hard safety gloves
- Dust mask
- Hammer
- Pry Bar
- Blade scraper
- Saw or grout cutter
- Tile cutter
- Utility clippers or pliers
- Screwdriver or chisel
- Utility knife
- Large bin bag
- Hot air gun (optional)
Preparation measures for the work area
It’s recommended that you protect any surfaces nearby and cover areas that may end up with shards of broken tiles, which can cause damage.
Whether you are removing wall tiles in the bathroom or kitchen, below are the preparation steps that you will need to follow:
- If you remove your bathroom tiles, then cover the bathtub and all the porcelain fittings and fixtures.
- In the kitchen, take all the removable light furniture out of the room and protect the countertops, bulky appliances and any kitchen shelves with a sturdy material like cardboard or bubble wrap.
- Cover any drains and sink holes (in both the kitchen and bathroom); this will prevent the drains and sink from clogging up, as dust and small particles can easily end up in the pipework.
- Don’t forget to protect the flooring, as well, be it laminate, hardwood or natural stone. Place an old blanket or rug that you no longer use on top to add some extra cushioning because heavy shattering tiles may damage the surface.
- It’s good to mention here that if your refurbishing project involves the removal of tiled splashback, then it’s a good idea to cut the power off to any electrical sockets on the wall.
Now that the working area is prepared, you must consider protective wear for yourself. Hard-wearing gloves are a must, as well as goggles and a protective mask to prevent you from inhaling excessive dust.
How to remove wall tiles (Step-by-step)
1. Remove the grout
The thought of removing grout can be daunting, it is probably the most time-consuming part of the job, but if it’s done properly, it will save you time later on. A heat gun or a blow dryer will be helpful to soften the grout.
Then, use a utility knife to scrape it away and make sure you remove it down to the wall. This way, you will be isolating each tile to then pop out more easily without causing further damage to the wall. You want to work as swiftly as possible to leave the wall behind nice and even.
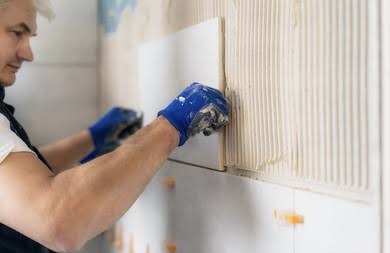
2. Remove the tiles from the walls
For a whole wall of tiles, start by tapping the corners of a few tiles to locate any loose edges. This will be your starting point. Then, slide the chisel behind the tile and give it a light hit with the hammer to apply pressure and get the tile loosened from the adhesive. This way, you can take them down without breaking them.
The first tile is usually the hardest to remove, but the other tiles’ exposed edges will make the rest of the job less strenuous once removed.
3. Break the tiles
In the unlucky scenario, where the tiles are directly set into the mortar, you would have to break them into bits. Wear a protective eye mask – porcelain tiles may break into extremely sharp pieces. Try to break the tiles from the side with a hammer and chisel to reduce the number of shards. Work in horizontal lines.
4. Clear off the adhesive and any remains
Getting all the adhesive and grout off the wall might look like an impossible job, but you may use a cold chisel, utility knife or tile cutter to remove the remains. You would want to ensure that the wall or plasterboard is flat and even for laying the new tiles. Also, snip off the spacer lugs with utility clippers or pliers.
With all our ‘How to Blogs’, we recommend you use this as a guide only and do further research by visiting the HIA website. The HIA Website provides expert knowledge in all areas of building.